Showing posts with label Other. Show all posts

Saturday, 17 July 2021

Enjoy a total of 35 tools for free || মোট 35 টি Tools Enjoy করুন সম্পূর্ণ ফ্রিতেই

একটি Free site, যেখান থেকে আপনি বিভিন্ন Premium Site এর video,photo,vectors & music Download করতে পারবেন অনায়াসেই।

নিচে কিছু সাইটের List দেয়া হল যার Premium fileগুলো Download করতে পারবেন downloader.la Use করে
  • Shutterstock
  • Adobe Stock
  • Gettyimages
  • StoryBlocks
  • SoundCloud
উপরে উল্লেখিত সব সাইটের Premium Fileগুলো ফ্রিতেই Download করতে পারবেন কোন ঝামেলা ছাড়াই।


Website Link:- https://downloader.la/


তাছাড়া এই Site থেকে যেকোন Scribd Documents File Download করা যায় এবং Facebook/Instagram Video Download এরও Option রয়েছে এতে।


এই সাইটের Problemটা হল সব কিছু Accurate Resolution এ পাবেন না। আর তাছাড়া Commertial Use এর জন্যও এই Site না। Google Ads একটু বিরক্তির কারণ হতে পারে, তবে আর কোন Problem দেখা যায়নি এই সাইটে।


সবশেষে একটা কথা Mention করে দিতে চাচ্ছি আপনি সব Premium Site এর File download এর সময় অবশ্যই নিচে Example Link টা Check করে নিবেন যেন তা আপনার কাঙ্খিত Link এর Format এর সাথে মিলে যায়।


Use YouTube's premium app for free and check out its features

বিশ্বের সবচেয়ে জনপ্রিয় অনলাইন ভিডিও প্লাটফর্ম YouTube (ইউটিউব)। যার ফলস্বরূপ আমরা সকলেই কমবেশী ব্যবহার করে থাকি। বিশেষ করে যাদের হাতে অ্যান্ড্রয়েড স্মার্টফোন এবং ওয়াফাই নেটওয়ার্কের ব্যবস্থা আছে, তারা সকলেই অনলাইনে যেকোন ভিডিও দেখার জন্য ইউটিউব ব্যবহার করে থাকি। তো আমি মূলত আজকে সেই জনপ্রিয় অনলাইন ভিডিও প্লাটফর্ম ইউটিউবের বিষয় নিয়ে হাজির হয়েছি। আমার এই টিউটোরিয়ালটি মূলত যারা অ্যান্ড্রয়েড স্মার্টফোনে ইউটিউব ব্যবহার করে থাকেন, তাদের জন্য। আমরা সবাই আমাদের স্মার্টফোনে যে ইউটিউব অ্যাপ ব্যবহার করে থাকি। তা কিন্তু মোবাইলে আগে থেকে ডিফল্টভাবে ফ্রি ভার্সন দেওয়া থাকে। যার ফলে আমরা ইউটিউব অ্যাপ এর বেসিক বা মৌলিক ফিচারগুলি ব্যবহার করতে পারি। কিন্তু অন্যান্য অ্যাপের মত ইউটিউবেরও প্রিমিয়াম ভার্সন রয়েছে। যাতে আরো অনেক ধরনের ফিচার রয়েছে। যা আমরা হয়তো অনেকেই জানি না এবং ঐ সুবিধা বা ফিচারগুলি থেকে বঞ্চিত হচ্ছি। তবে উক্ত প্রিমিয়াম এর সুবিধা আপনাকে কর্তৃপক্ষ দিতে পারে। যদি আপনি তাদেরকে মাসিক পেমেন্ট করেন। পেমেন্ট এর বিষয়টি তাদের বিভিন্ন প্যাকেজ আকারে ভাগ করা আছে। আমাদের অ্যান্ড্রয়েড স্মার্টফোন থাকতে কেন আমরা ইউটিউবের প্রিমিয়াম ভার্সন এর সুবিধা বা ফিচারগুলি ভোগ করব না। তাই চলুন আজকে থেকে ইউটিউব এর ফ্রি ভার্সন ছেড়ে প্রিমিয়াম ভার্সন ব্যবহার করি। কোনরকম টাকা দেওয়া ছাড়াই। ইউটিউবের প্রিমিয়াম ভার্সন অ্যাপটি আপনার মোবাইলে ইনস্টল করার পূর্বে 
microG নামের apk প্রোগ্রামটি এখানে ক্লিক করে ডাউনলোড করে ইনস্টল করে নিন। 
তারপর একদম ইউটিউবের সর্বশেষ প্রিমিয়াম ভার্সন এর অ্যাপটি 
ডাউনলোড করতে এখানে ক্লিক করুন এবং আপনার মোবাইলে ইনস্টল করে নিন। 
ইউটিউব প্রিমিয়াম অ্যাপের ফিচারসমূহ:
১. প্রথমত আপনি ইউটিউবে যেকোন ভিডিও একদম যেকোন অ্যাড বা বিজ্ঞাপন ছাড়া দেখতে পারবেন। অর্থাৎ ফ্রি ভার্সনের মত কোন ভিডিও দেখার সময় ৫ সেকেন্ডের কোন অ্যাড আসবে না। 
২. দ্বিতীয়ত যেকোন ভিডিও ডাউনলোড করতে পারবেন এবং পরবর্তীতে ইন্টারনেট ডাটা না থাকলেও অফলাইনে ভিডিও দেখতে পারবেন। যদিও ফ্রি ভার্সনে এই সিস্টেমটি চালু রয়েছে। তবে খেয়াল করে দেখবেন ফ্রি ভার্সনে কিছুকিছু ভিডিও ডাউনলোড দেওয়া যায় না। তবে এই প্রিমিয়াম ভার্সনে যেকোন ভিডিও ডাউনলোড দিতে পারবেন।
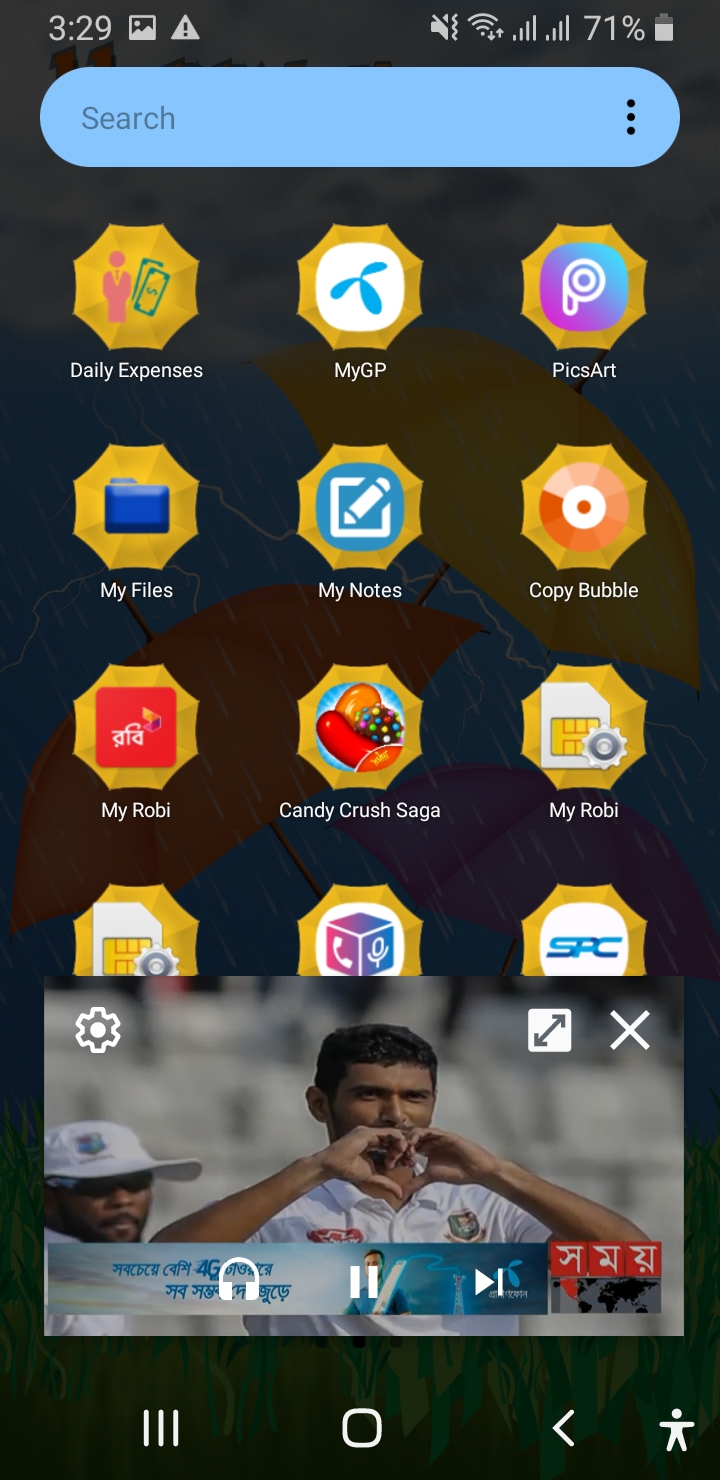
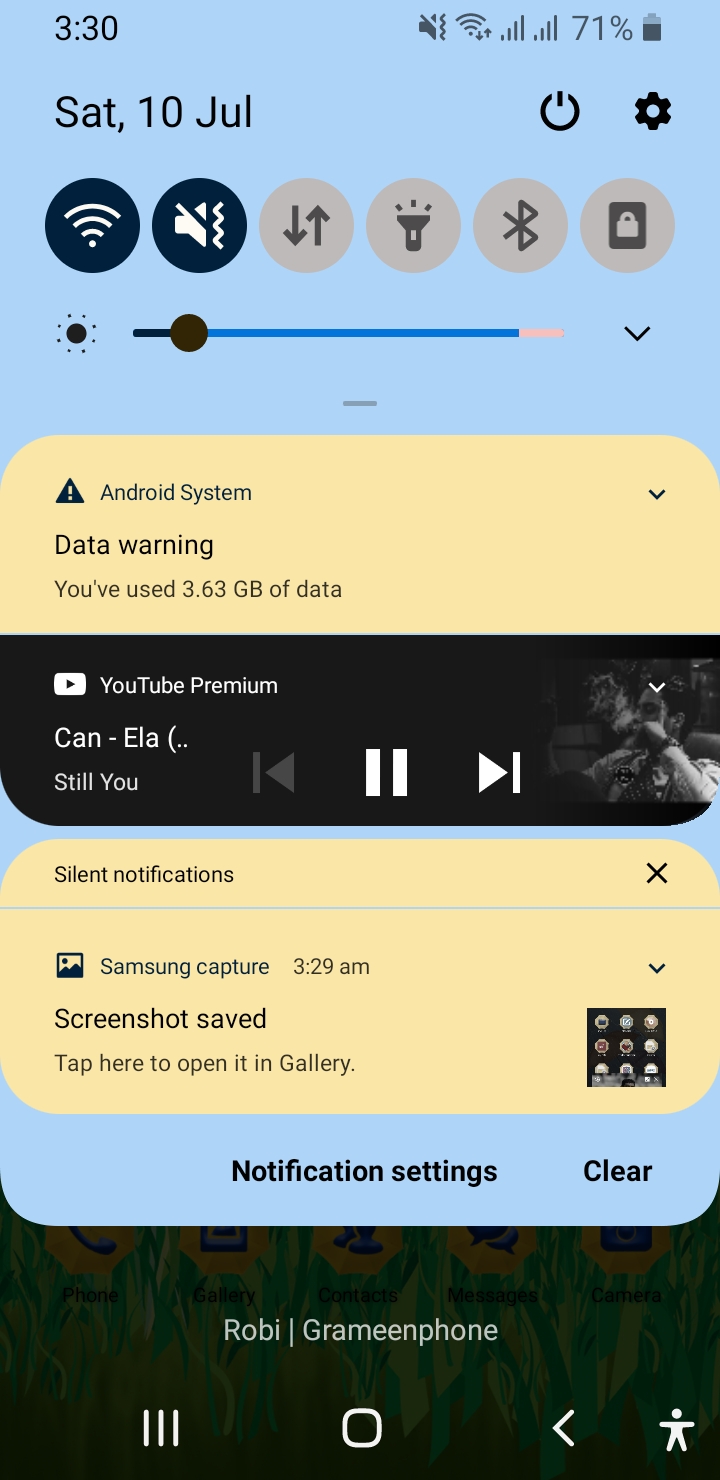
০৩. তৃতীয়ত আপনি যেকোন ভিডিও ব্যাকগ্রাউন্ডেও চালাতে পারবেন। অর্থাৎ আপনি আপনার মোবাইলে অন্যান্য যেকোন অ্যাপ ব্যবহারের সময় আপনি ইউটিউবে ভিডিও দেখতে পারবেন। এছাড়াও উক্ত ভিডিও আপনি ইচ্ছে করলে অডিও আকারেও শুনতে পারবেন। যা ফ্রি ভার্সনে করতে পারবেন না।
০৪. চতুর্থত ইউটিউবের সবচেয়ে জনপ্রিয় ফিচার ইউটিউব মিউজিক প্রিমিয়াম। মিলিয়ন মিলিয়ন গান শুনতে পারবেন কোনরকম অ্যাড বা বিজ্ঞাপন ছাড়া। যেকোন গান ডাউনলোড করতে পারবেন এবং পরবর্তীতে অফলাইনে শুনতে পারবেন। ব্যাকগ্রাউন্ড সিস্টেম করে অডিও আকারে।
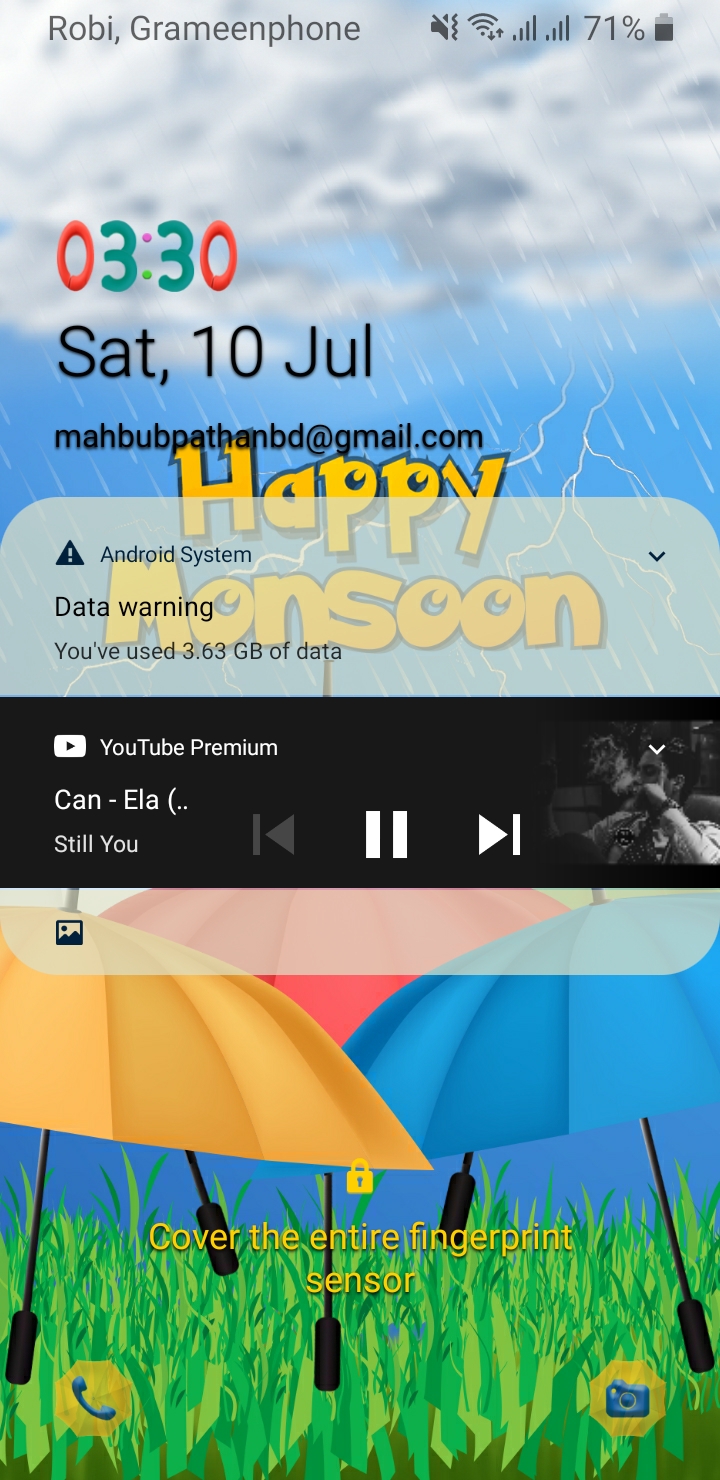
এছাড়াও আরো অনেক সুবিধা ভোগ করতে পারবেন। যেমন এর মধ্যে সচারচর একটা বিষয় হলো আপনি যখন ইউটিউব অ্যাপটি ব্যবহার করবেন। অর্থাৎ হোম পেজে থাকবেন। তখন ভিডিও প্লে বা চালু না করলেও অটো ভিডিও চলতে থাকবে। যার ফলে আপনি ভিডিও প্লে না করেই ভিডিওর পুরো বিষয়টি বুঝে যেতে পারবেন। এছাড়াও ব্যাকগ্রাউন্ডে প্লে করার সিস্টেম থাকাতে আপনি আপনার মোবাইল লক করেও ইউটিউব থেকে যেকোন গান বা অন্যকিছু শুনতে পারবেন। এইরকম আরো অনেক সুবিধা পাবেন অ্যাপটি ব্যবহার করলে। সর্বশেষ সাবধানতার জন্য বলে রাখি, অবশ্যই অ্যাপটিতে কোন জিমেইল অ্যাকাউন্ট বা আইডি ব্যবহার করবেন না। যদি ব্যবহার করে থাকেন এবং গুগল কর্তৃপক্ষ বিষয়টি বুঝতে পারে যে, আপনি কোনরকম টাকা পয়সা তাদেরকে না দিয়ে ফাকি দিচ্ছেন। তাহলে হয়তো তারা আপনার অ্যাকাউন্টটি আজীবনের জন্য ব্যান বা বাতিল করে দিতে পারে। তাই আমি বলব, সাধারণ একটা আলাদা করে জিমেইল অ্যাকাউন্ট তৈরি করে নিতে পারেন। এই অ্যাপটিতে ব্যবহার করার জন্য। কারণ আইডি থাকলে কিছু সুবিধা ভোগ করা যায়।

Tuesday, 15 December 2020

Ping high Pubg || Ping high Free fie || Fix ping problem

 There are many of us who play Free Fire or other games but we have some common problems

Today is a great day for those who have game lag as their mobile gets hot or there is too much ping

I am sharing an app to solve the ping problem through an app

And you will get the solution of RAM Claire with VPN. There are many features in an app first

Download the app from the Play Store or click here then install

Then open the app

Screenshot Image 

Now there is a switch button for those who have a ping problem while gaming, click on it to turn it on and from here automatically.

Game T will be connected to the IP of the country. Or you can connect the IP of any country if you want

Those Ping problems.

Now look at the 3 icons below.

Those mobiles get hot

Screenshot Image 

Here you can see the temperature of the mobile then click on the switch button that is here

And see how fast the magic cools down the mobile has several features inside an app

Many of these people need this app the most, which means that the heating on the mobile becomes hotter and those who play games

Their app is very useful when the internet speed is low

Monday, 30 March 2020

Activate Windows 10 in one click no software need


Hope everyone is well.
Today I am sharing with you the simplest method I have found for activating Windows 10

First download the .zip file from the bottom
Activate windows 10.zip

Then after extracting the file
activate1.cmd
activate2.cmd
You will find two files with the same name.
First, right-click on the file activate1.cmd and run with Run as Administrator.
After a while, a message like windows activated will appear in the terminal.
If the activate1.cmd file does not work / Windows is not active, then right-click on the activate2.cmd file and run with Run as Administrator. Once activated with the file activate1.cmd, this file will not be run.
This way you can activate your Windows 10 operating system in a very simple way.

__________________________________________________


উইন্ডোজ ১০ এক্টিভ করার জন্য আমার দেখা সবচেয়ে সহজ মেথড টি আজ আপনাদের সাথে শেয়ার করছি
প্রথমেই নিচ থেকে .zip ফাইলটি ডাওনলোড করে নিন
Download Activate windows 10.zip
তারপর ফাইলটি extract করার পর
activate1.cmd
activate2.cmd
এরকম নামের দুটি ফাইল পাবেন।
প্রথমেই activate1.cmd ফাইলটিতে right click করে Run as administrator দিয়ে run করান।
কিছুক্ষন পর windows activated এরকম টাইপ message আসবে terminal এ।
যদি activate1.cmd ফাইলটি দিয়ে কাজ না হয় / উইন্ডোজ এক্টিভ না হয় তবে activate2.cmd ফাইলটিতে right click করে Run as administrator দিয়ে run করান, activate1.cmd ফাইলটি দিয়ে এক্টিভ হয়ে গেলে এই ফাইলটি আর রান করানো লাগবে না।
এরকম ভাবে খুব সহজ ভাবেই আপনার উইন্ডোজ ১০ অপারেটিং সিস্টেম টি এক্টিভ করে নিতে পারবেন।

Monday, 9 March 2020

Free Online TV || Watch Free Online TV Channels In VLC Player


VLC is a open source software media player. Everyone use VLC for videos but few of you may know that you can Watch Free Online TV Channels In VLC Player.

VLC Streaming Overview

now you can easily stream online tv channels through VLC player .it’s simple just to install VLC player on your PC and follow these steps and enjoy watching your favourite programs on even at low speed. VLC is a simple fast and powerful media player. It plays almost everything Files, Discs, Webcams , Devices and Streams.The best thing about VLC player is that it runs on all platforms Windows, Linux, MAC OS X, Unix.

Watch Free Online TV Channels In VLC Player – Guide

Step#1

Open VLC media player. If you don’t have then Install VLC player on your PC here.
download button 

Step#2

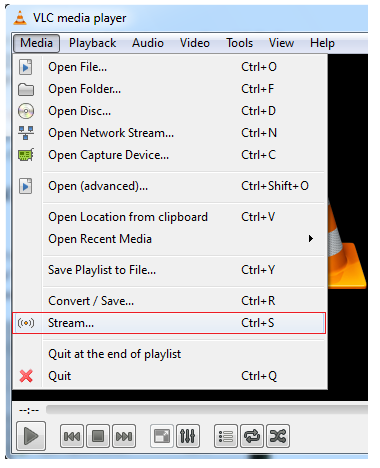
Go to the ‘MEDIA’ from MENU BAR and select ‘STREAM’.
Watch Free Online TV Channels In VLC Player
Step#3

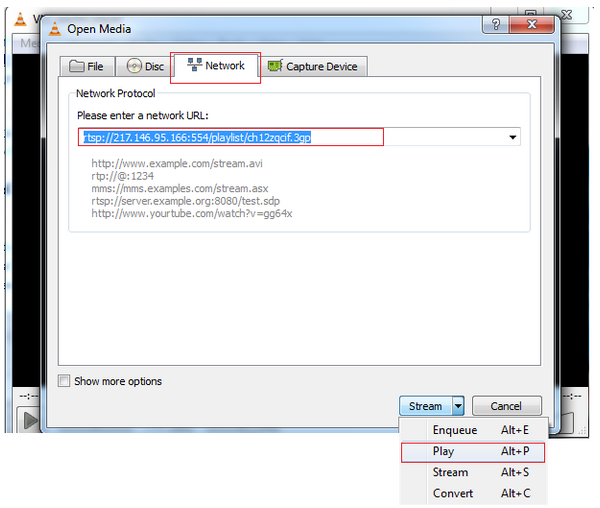
Now go to the third tab ‘NETWORK’ .Enter the URL of your favourite channel which you want to watch .
For Example: URL of B4U Music channel – rtsp://217.146.95.166:554/playlist/ch12zqcif.3gp
On the right side there is ‘Stream dropdown’. Select ‘PLAY’.
stream Online TV Channels In VLC Player
Now you have learnt how to stream free online channels in VLC media player. You can get URL of your favourite TV channels easily by simply search URL of your fav channel on Google. Enjoy Watching!

Streaming URLs of Other TV Channels

I have given multiple streaming address of TV channels in a text file. This can be downloaded from below button.

download button

How to Recover Deleted File || 100% Recover Deleted File

Losing files is upset. Every now and then, we go through unfortunate situations. One such situation is accidental deletion of your important file. It could be a document, image or a video. Regardless of what type of file you have just lost, nothing is harder for the best free data recovery software – EaseUS. Remember, there is a difference between restoring files from recycle bin and recovering data after permanent deletion. EaseUS software has ability to even restore those files that got deleted when you clicked on empty recycle bin.
Let us tell you, there are numerous paid and data recovery software solutions available in the market. If you are a first timer, then you might want a tool that provides its services for free, which is quite a good deal. This is because you want to check the software skills before using it. How can you identify which one is the best software till you give it a try.  Therefore, you must check it before putting your hard-earned money into it. Also, you should be seeking out for a tool that’s easy-to-use rather than trouble-to-use.

How EaseUS data recovery software works?

As soon as you open the EaseUS Data Recovery software, the screen will show you all drives including hard drives and external drives. Being the prominent provider of enjoyable user experience, EaseUS performs unbelievably fast scanning of hard drives and other storage devices, and restores all data back through its quick scan. 
After scanning, deleted files will appear in front of you. This will give users an opportunity to select the file which they lost accidentally. At this stage, user may browse the file name by typing the file name or if you can’t remind of that file name, you can always search for files by their format.
Select the required file and then press recover button. While restoring the files back, make sure to save it on a different partition. This would prevent you to replace the old information with the new one. The software gives full control over which data to retrieve and where the data should be located.
EaseUS free data recovery options are wrapped up into an advanced UI that is quite simple, as well as responsive. It makes sure you get all your recovered data promptly.
Once the data restoration gets completed, the software will notify you about it. Hence, it’s quite possible to retrieve your files back after emptying recycle bin, but you are required to take these few factors into account.
  • Never install this software in the same drive you aim to get the deleted files back from. Or else, the software will erase your deleted file.
  • Ensure to keep all your drives untouched and do not copy paste anything. 

 Download now

Sunday, 1 March 2020

Build Your Own Currency Exchange Web App

Build Your Own Currency Exchange Web App in ~100 lines using CRA 


This tutorial describes how to create a simple currency exchange app in just about 100 lines of code using the Create React App boilerplate.

🛠️ Preparation

First, create the react app. I call it "rates".
$ yarn create react-app rates
Run the command in your root
$ yarn start
Your web app will be available on http://localhost:3000

⚓ Fetching the currencies rate

For currency exchange data we will use free API on exchangeratesapi.io
We will load the latest data of the currencies rates.
Install the swr and unfetch libraries. It helps to easily fetch API.
$ yarn add swr unfetch
Create the fetcher function outside the App component
// src/App.js
import React from "react";
import "./App.css";
import fetch from "unfetch";

const API_URL = "https://api.exchangeratesapi.io";

const fetcher = async path => {
  const res = await fetch(API_URL + path);
  const json = await res.json();
  return json;
};

// function App...
Add useSWR in App component to fetch data
import React from "react";
import "./App.css";
import fetch from "unfetch";
import useSWR from "swr";

 // API_URL = ...

 // const fetcher = ...

 function App() {
  const { data: currencies } = useSWR("/latest?base=EUR", fetcher);

  return <div>Welcome to your Currency exchange app!</div>;
 }
Now we have the currencies rates in currencies.rates variable.
To see the JSON data of currencies rates you can open the API url directly into your browser: https://api.exchangeratesapi.io/latest?base=EUR
The ?base=EUR query is used to get all rates relative to EUR currency.

💄 Add the UI

For ui, we will use the material-ui design system. Install it:
$ yarn add @material-ui/core
Create the UI for our currency exchange app in the App component.
// ...
import {
  Container,
  Paper,
  Grid,
  TextField,
  Select,
  MenuItem
} from "@material-ui/core";

// ...

function App() {
  const { data: currencies } = useSWR("/latest?base=EUR", fetcher);

  if (!currencies) {
    return null;
  }

  return (
    <Container className="currency-exchange-container" fixed>
      <h1>Currency exchange</h1>
      <Paper
        className="currency-exchange-paper"
        variant="outlined"
        elavation={1}
      >
        <Grid container spacing={3}>
          <Grid item xs={6}>
            <TextField type="number" />
          </Grid>
          <Grid item xs={6}>
            <TextField type="number" />
          </Grid>
          <Grid item xs={6}>
            <Select>
              <MenuItem value={"EUR"}>EUR</MenuItem>
              {Object.keys(currencies.rates).map((rate, key) => (
                <MenuItem key={key} value={rate}>
                  {rate}
                </MenuItem>
              ))}
            </Select>
          </Grid>
        </Grid>
      </Paper>
    </Container>
  );
}
Now, look at the following code snippet. We create the currency selection box by iterating over all possible rates from our API data. Since we fetch rates relative to EUR, so we should manually add the EUR item, because it doesn't exist in rates object.
  <Select>
    <MenuItem value={"EUR"}>EUR</MenuItem>
    {Object.keys(currencies.rates).map((rate, key) => (
      <MenuItem key={key} value={rate}>
        {rate}
      </MenuItem>
    ))}
  </Select>
When the currencies are not loaded, we just return null, because of currencies rates is undefined at that moment.
  if (!currencies) {
    return null;
  }
Add some styles to App.css
h1 {
  font-weight: 300;
  color: #636363;
  margin-bottom: 3rem;
}

.currency-exchange-container {
  display: flex;
  flex-direction: column;
  align-items: center;
  justify-content: center;
  height: 100vh;
}

.currency-exchange-paper {
  max-width: 350px;
  padding: 30px 30px 40px 30px;
}

.MuiInput-root {
  width: 100%;
}

⚙️ Add logic

Now we add the inputs state to our App component
function App() {
  const { data: currencies } = useSWR("/latest?base=EUR", fetcher);

  const [fromValue, setFromValue] = useState(1);
  const [toValue, setToValue] = useState(1);

  const [fromCurrency, setFromCurrency] = useState("EUR");
  const [toCurrency, setToCurrency] = useState("EUR");

  const handleFromCurrencyChange = e => {
    setFromCurrency(e.target.value);
  };

  const handleToCurrencyChange = e => {
    setToCurrency(e.target.value);
  };

  const handleFromValueChange = e => {
    setFromValue(parseFloat(e.target.value));
  };

  const handleToValueChange = e => {
    setToValue(parseFloat(e.target.value));
  };

  if (!currencies) {
    return null;
  }

  return (
    <Container className="currency-exchange-container" fixed>
      <h1>Currency exchange</h1>
      <Paper
        className="currency-exchange-paper"
        variant="outlined"
        elavation={1}
      >
        <Grid container spacing={3}>
          <Grid item xs={6}>
            <TextField
              type="number"
              value={fromValue}
              onChange={handleFromValueChange}
            />
          </Grid>
          <Grid item xs={6}>
            <TextField
              type="number"
              value={toValue}
              onChange={handleToValueChange}
            />
          </Grid>
          <Grid item xs={6}>
            <Select value={fromCurrency} onChange={handleFromCurrencyChange}>
              <MenuItem value={"EUR"}>EUR</MenuItem>
              {Object.keys(currencies.rates).map((rate, key) => (
                <MenuItem key={key} value={rate}>
                  {rate}
                </MenuItem>
              ))}
            </Select>
          </Grid>
          <Grid item xs={6}>
            <Select value={toCurrency} onChange={handleToCurrencyChange}>
              <MenuItem value={"EUR"}>EUR</MenuItem>
              {Object.keys(currencies.rates).map((rate, key) => (
                <MenuItem key={key} value={rate}>
                  {rate}
                </MenuItem>
              ))}
            </Select>
          </Grid>
        </Grid>
      </Paper>
    </Container>
  );
}
Also, add the two following functions for currency exchange
const convertFromTo = () => {
    const fromRate =
      fromCurrency === "EUR" ? 1 : currencies.rates[fromCurrency];
    const valueInEur = fromValue / fromRate;
    const toRate = toCurrency === "EUR" ? 1 : currencies.rates[toCurrency];
    setToValue(valueInEur * toRate);
  };

  const convertToFrom = () => {
    const toRate = toCurrency === "EUR" ? 1 : currencies.rates[toCurrency];
    const valueInEur = toValue / toRate;
    const fromRate =
      fromCurrency === "EUR" ? 1 : currencies.rates[fromCurrency];
    setFromValue(valueInEur * fromRate);
  };
One function converts currencies forward, and other - backward. In both functions, firstly, we convert currencies to EUR, because all rates we fetched from API are relative to euros.
The last thing is to add the React hooks which run the rates exchange after the input change.
  useEffect(() => {
    convertFromTo();
  }, [fromValue, toCurrency]);

  useEffect(() => {
    convertToFrom();
  }, [toValue, fromCurrency]);
Here is a full App.js file
import React, { useState, useEffect } from "react";
import "./App.css";
import fetch from "unfetch";
import useSWR from "swr";
import {
  Container,
  Paper,
  Grid,
  TextField,
  Select,
  MenuItem
} from "@material-ui/core";

const API_URL = "https://api.exchangeratesapi.io";

const fetcher = async path => {
  const res = await fetch(API_URL + path);
  const json = await res.json();
  return json;
};

function App() {
  const { data: currencies } = useSWR("/latest?base=EUR", fetcher);

  const [fromValue, setFromValue] = useState(1);
  const [toValue, setToValue] = useState(1);

  const [fromCurrency, setFromCurrency] = useState("EUR");
  const [toCurrency, setToCurrency] = useState("EUR");

  const handleFromCurrencyChange = e => {
    setFromCurrency(e.target.value);
  };

  const handleToCurrencyChange = e => {
    setToCurrency(e.target.value);
  };

  const handleFromValueChange = e => {
    setFromValue(parseFloat(e.target.value));
  };

  const handleToValueChange = e => {
    setToValue(parseFloat(e.target.value));
  };

  const convertFromTo = () => {
    const fromRate =
      fromCurrency === "EUR" ? 1 : currencies.rates[fromCurrency];
    const valueInEur = fromValue / fromRate;
    const toRate = toCurrency === "EUR" ? 1 : currencies.rates[toCurrency];
    setToValue(valueInEur * toRate);
  };

  const convertToFrom = () => {
    const toRate = toCurrency === "EUR" ? 1 : currencies.rates[toCurrency];
    const valueInEur = toValue / toRate;
    const fromRate =
      fromCurrency === "EUR" ? 1 : currencies.rates[fromCurrency];
    setFromValue(valueInEur * fromRate);
  };

  useEffect(() => {
    convertFromTo();
  }, [fromValue, toCurrency]);

  useEffect(() => {
    convertToFrom();
  }, [toValue, fromCurrency]);

  if (!currencies) {
    return null;
  }

  return (
    <Container className="currency-exchange-container" fixed>
      <h1>Currency exchange</h1>
      <Paper
        className="currency-exchange-paper"
        variant="outlined"
        elavation={1}
      >
        <Grid container spacing={3}>
          <Grid item xs={6}>
            <TextField
              type="number"
              value={fromValue}
              onChange={handleFromValueChange}
            />
          </Grid>
          <Grid item xs={6}>
            <TextField
              type="number"
              value={toValue}
              onChange={handleToValueChange}
            />
          </Grid>
          <Grid item xs={6}>
            <Select value={fromCurrency} onChange={handleFromCurrencyChange}>
              <MenuItem value={"EUR"}>EUR</MenuItem>
              {Object.keys(currencies.rates).map((rate, key) => (
                <MenuItem key={key} value={rate}>
                  {rate}
                </MenuItem>
              ))}
            </Select>
          </Grid>
          <Grid item xs={6}>
            <Select value={toCurrency} onChange={handleToCurrencyChange}>
              <MenuItem value={"EUR"}>EUR</MenuItem>
              {Object.keys(currencies.rates).map((rate, key) => (
                <MenuItem key={key} value={rate}>
                  {rate}
                </MenuItem>
              ))}
            </Select>
          </Grid>
        </Grid>
      </Paper>
    </Container>
  );
}

export default App;

✨ Finished!

Congratulations! You have done the currency exchange app using the CRA (Create React App).
The full source code you can find in my repository epranka/rates.


Saturday, 29 February 2020

Earn Bitcoin, Bitcoin Cash, Dogecoin, Litecoin and Dash for free

Coinpot, the microwallet for the best faucets ever


The world of cryptocurrencies is interesting but complex at the beginning.
Bitcoin is an online and secure virtual currency. It is already accepted as a payment method by many many online and offline vendors. 
Collecting free small amounts of Bitcoin, as well as Ethereum, Litecoin and other Altcoins is a good way to start understanding how cryptocurrencies work.
Faucets are websites, generally full of advertising links, which allow you to earn small amounts of Bitcoin and Altcoin just by solving the captcha for the recognition (and exclusion) of any bots. Many faucets are just a waste of time because they do not pay or dispense too small amounts of cryptocurrencies.
After months of testing I chose a small number of faucet where to invest my time.
FreeBitcoin allow you to easily earn Bitcoin with a simple and fast interface. 
First of all, my advise is to sign up on the best microwallet for faucets, CoinPot.

CoinPot

You can thus accumulate Bitcoin, Litecoin, Dogecoin, BitcoinCash and Dash. You can also mine all these coins by passively using your computer’s CPU at the speed you prefer.
At this time there are six faucets connected to CoinPot:

*BIT FUN the best CoinPot faucet for Bitcoin. Claim every 3 minutes!

Play games, have fun, earn bitcoin! Claim every 3 minutes. Free withdrawals. 50% lifetime referral commission commission

*Bonus Bitcoinfaucet to get some Bitcoin for free. You can claim every 15 minutes. I strongly advise you to click on “Always receive the average claim amount” in the “Claim settings” because the random claim is always under the average. Free bitcoin faucet. Claim every 15 minutes. Receive up to 5,000 satoshi per claim. Automatic 5% DAILY BONUS. Free…
*Moon Bitcoin — a simple faucet to gain bitcoin every 5 minutes (recommended to claim every 30 minutes) Moon Bitcoin is a bitcoin faucet with a difference…YOU decide how often to claim! Whereas most faucets only allow you… 
moonbit.co.in


 *Moon Dogecoinanother faucet of the Moon family to earn Dogecoin every 5 minutes (here too I advise you to claim every 30 minutes) Moon Dogecoin is a dogecoin faucet with a difference…YOU decide how often to claim! Weekly payments. 25% referral… 

moondoge.co.in

*Moon Litecoin — another faucet of the Moon family to earn Litecoin every 5 minutes (here too I advise you to claim every 30 minutes)  Moon Litecoin is a litecoin faucet with a difference…YOU decide how often to claim! Weekly payments. 25% referral…

moonliteco.in

Moon Dashcoin another faucet of the Moon family to earn DASH every 5 minutes (here too I advise you to claim every 30 minutes) Whereas most faucets only allow you to claim once per hour or once per day, we allow you to claim as often or as little…

Moon Bitcoin Cash — another faucet of the Moon family to earn Bitcoin Cash every 5 minutes (here too I advise you to claim every 30 minutes)Whereas most faucets only allow you to claim once per hour or once per day, we allow you to claim as often or as little…

Earn BTC for Viewing Ads | BTCClicks BTCClicks is a paid-to-click (PTC) site where members can earn BTC for viewing ads and advertisers can target bitcoin


Sunday, 23 February 2020

Live TV Channel No Ads 50+ Bangladeshi Channel

Free Live TV Channel  দেখুন এএকদম ফ্রি, আনলিমিটেড

Download Free Live TV.apk


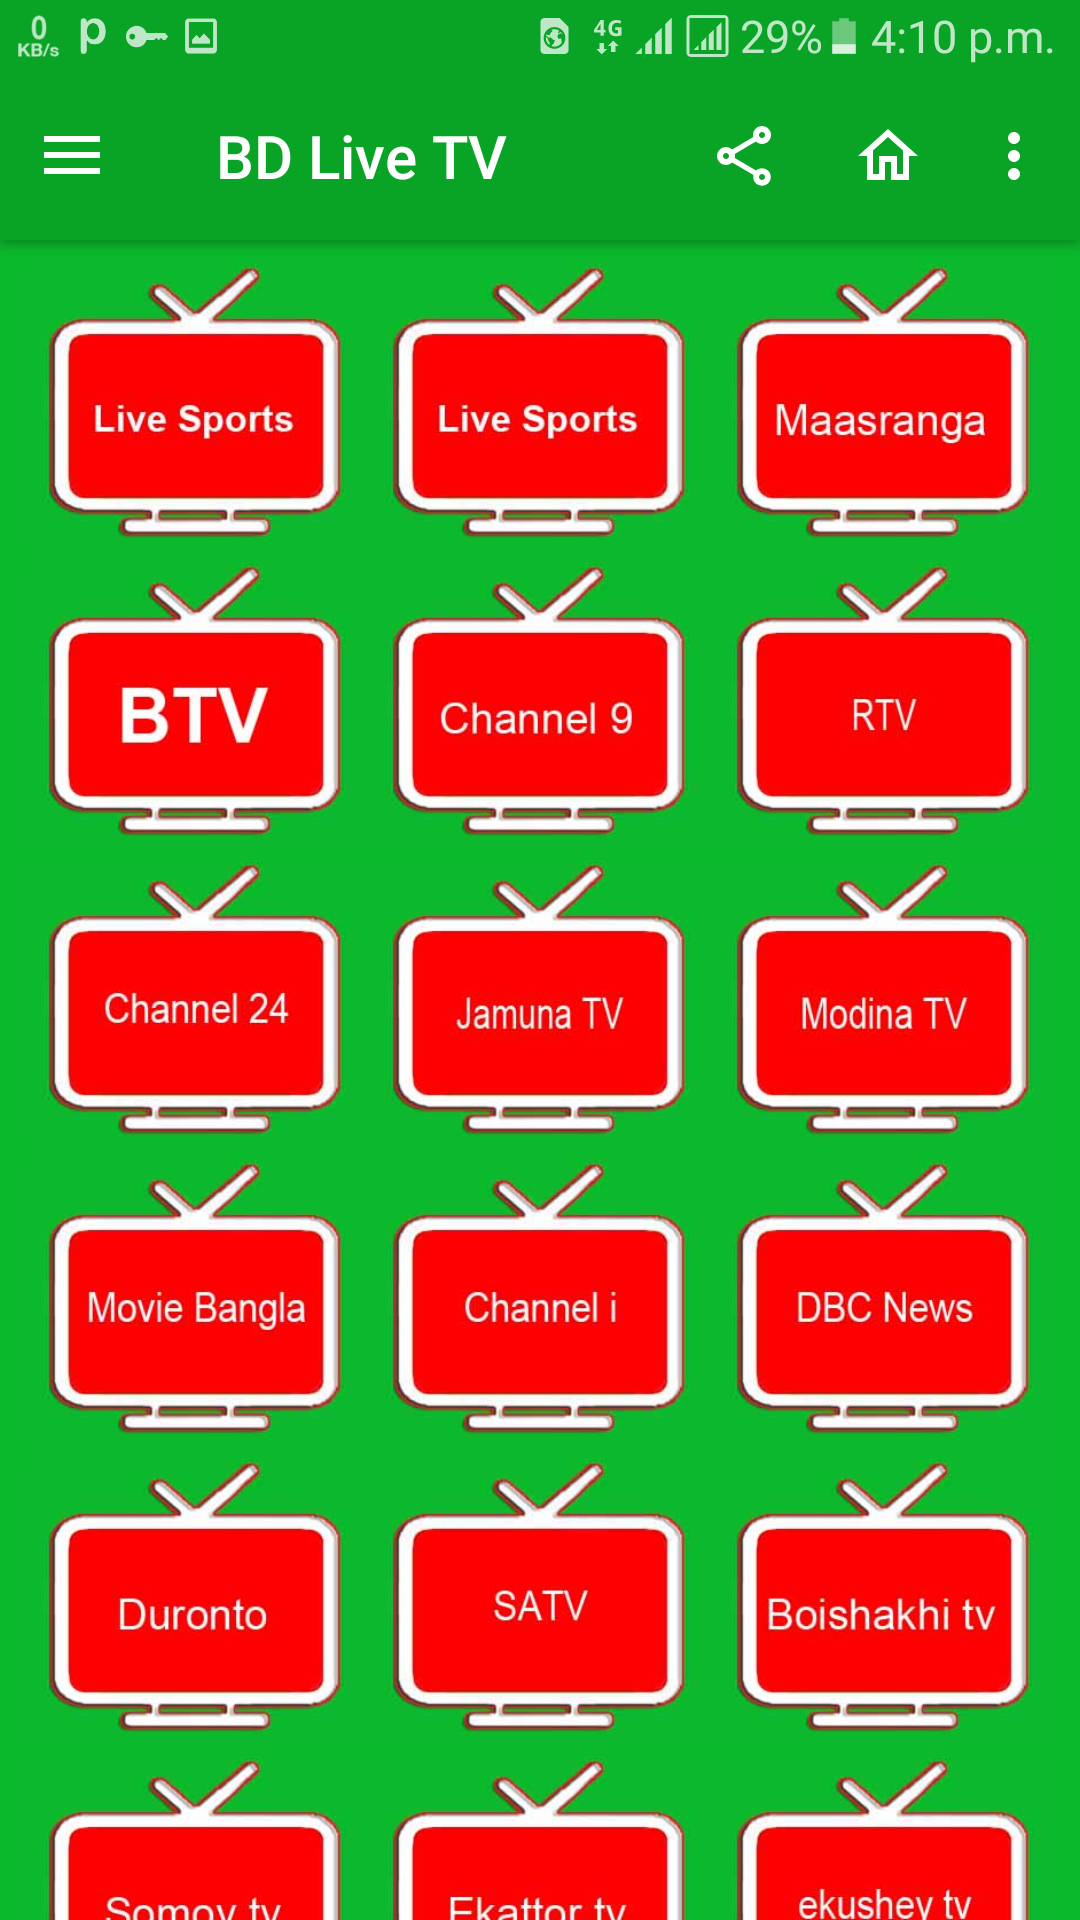
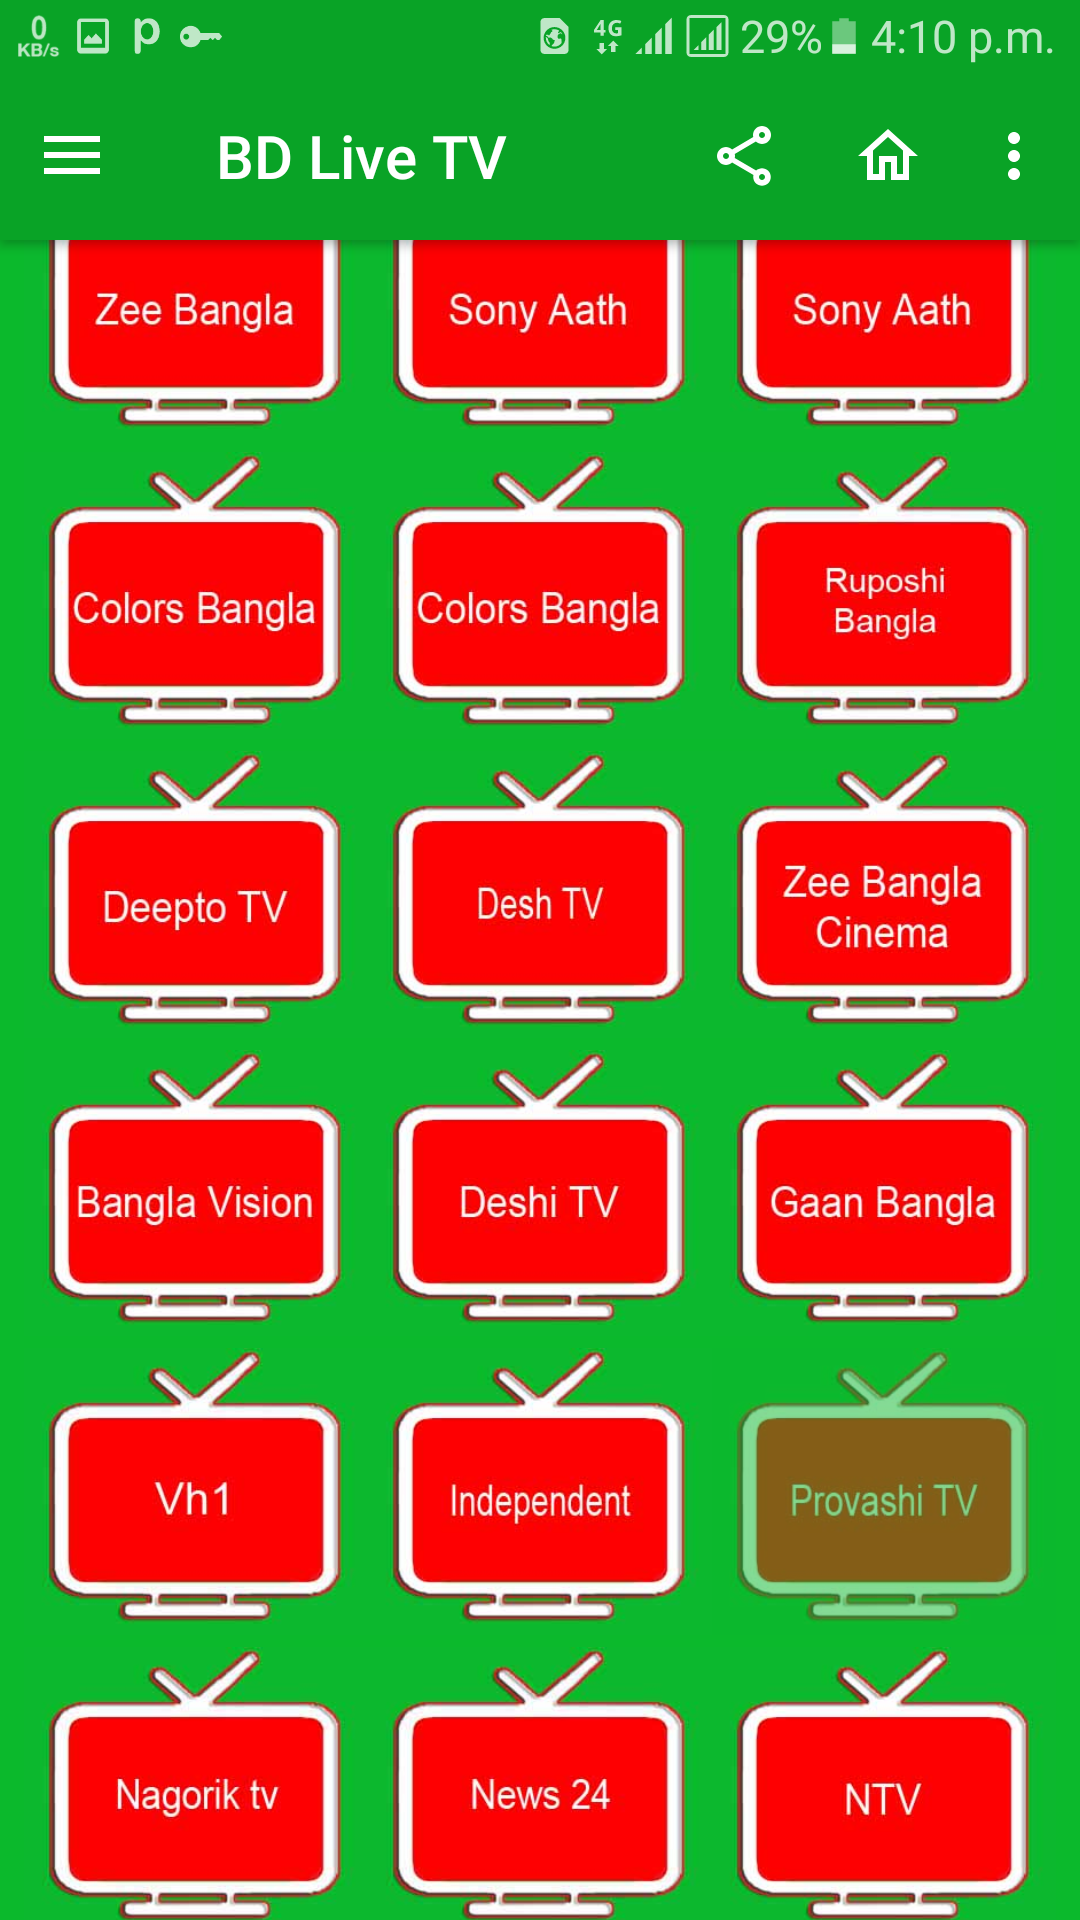
এখন এই অ্যাপ থেকে প্রায় ৫০+ টিভি চ্যানেল দেখা যাবে তাও আবার ১০০ kbps স্পিডে।আর কোয়ালিটিও যথেষ্ট ভালো যা আপনি নিচের স্ক্রিনশট এ দেখতে পাচ্ছেন।

স্ক্রিনশট :


বিশেষ সুবিধা:


১.৫০+ চ্যানেল এড আছে।
২.লোডিং কম লাগে। 3g কোনো রকম পেলেই চলবে।
৩.অ্যাপ এর নিজস্ব ভিডিও প্লেয়ার আছে।যার কারনে এক্সট্রা স্টোরেজ খরচ হবে না। যদিও এটি আগের ফিচার।
৪.সকল ধরনের চ্যানেল রয়েছে।যেমন:নাটক,খেলা,এনিমেল প্লেনেট,Discovery,হিন্দি,খবর।এসকল ধরনের চ্যানেল রয়েছে।
৫.অ্যাপ টিতে এড দেখাতো।যা খুব বিরক্তিকর। যা আমি নিজে মোড করে এড বন্ধ করিয়েছি।তাই আপনারা এড দেখার বিরক্তি ছাড়াই টানা লাইভ টিভি দেখতে পারবেন। নিচে ডাউনলোড লিংক দেওয়া হলো।

Download Free Live TV.apk


Wednesday, 23 January 2019

Gtv Live | জিটিভি লাইভ | Powered by Rabbithole | Official Broadcast Link

Cricket Live Match Result

Cricket Live Match Result | dropNup

Cricket Live Match Result

↻ - Watch ↻ -